I’ve been wanted to do a project with watercolors for awhile, and I’ve been seeing these really cute watercolor state paintings all over the internet and I figured it was a great starter project into watercolors.
I took a watercolor class in college and even though I’m not an expert at it, watercolors are fun to play with and easy to use when you have figured a few things out. (I plan on doing another post about all things watercolor, but that’ll come later.) Today I’ll teach you what you probably already know from elementary school.

Or if you want an instant download, check out our Etsy site. I’ve been working on a bunch of the other states so let me know if you want a particular state that I don’t have up yet and I’ll get it up and posted within a day or so!
OR make your own!!
You’ll need:
Watercolors (the cheap crayola kinda would even work for this, but if you want deeper more vibrant colors I would recommend going to a craft store and getting a few of the tubes of watercolors, the smallest one would work, with watercolors a little goes A LONG way)
an exacto knife (or if you have a die-cut machine, like a Silhouette or Cricut, you can just cut out your shape)
cutting board, if you are using an exacto knife
watercolor paper (watercolor paper works WAY better than just regular copy paper)
a printout of the state you want
contact paper
paint brush

First cut the contact paper to be larger than the shape. I made it the same size as my paper.

Next put your shape on top of the contact paper, and then on top of the cutting board. With an exacto knife cut out the shape. Take your time, the more detailed you are the better the end result will be.
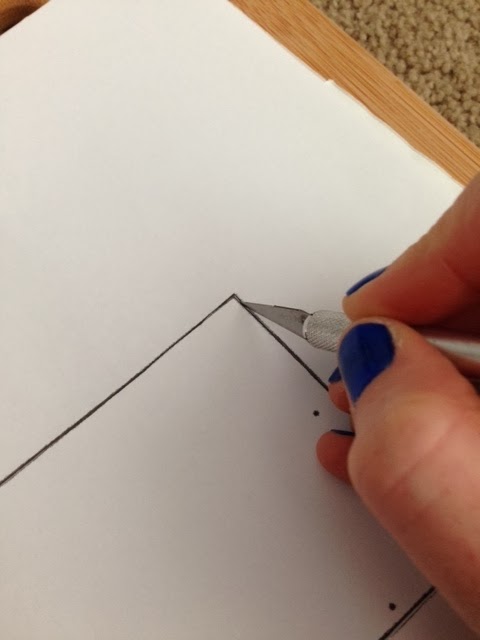

Next once you have your shape cut out you can pick between the actual shape, or the outline of the shape.

I decided to use the outline of the shape so that the watercolor would create the shape itself.
I didn’t want the outline of the state.

Next just because I needed to represent the 509 (hahaha sometimes I pretend I’m cool like that) I cut out a heart and placed it on my paper where I’m from, SPOKANE!


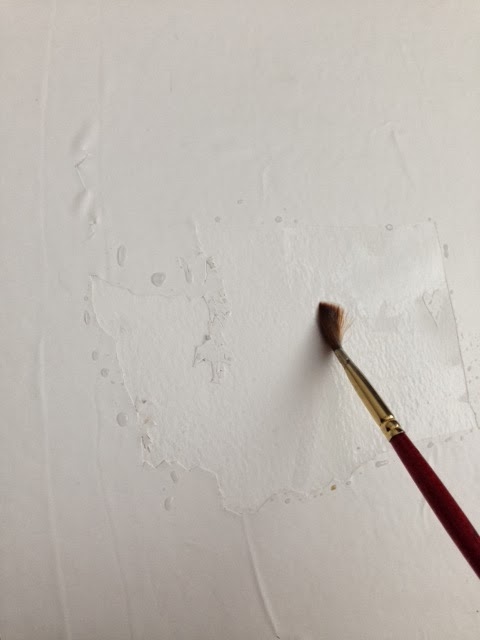
After you pressed your contact paper down all the way making sure all the edges are clean and no gaps, I then took a brush and went over my paper with JUST water.
(This method is called wet on wet, and it lets the colors bleed into each other and kinda do their own thing.)
Then I added some color and watch it seep into the water already on the paper. I love me some blue…

Then I had to add some green for the Evergreen State, and mix the colors. Even tip your paper to let the colors run from side to side.

Next I would let it dry. But since I am a little impatient, I took off my contact paper, including the little heart.
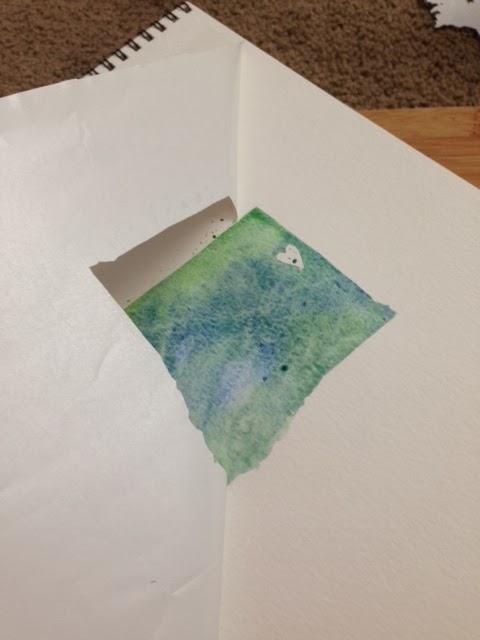
See how I wasn’t very careful on the left? Oops!

Next if you want to, I’ve seen some with some specks all over. This is SO simple and fun. First wet your brush, and then add some color to it is nice and wet. Then take your brush and lift it a few inches from your paper. Without touching the brush to the paper, tap or flick the brush so some of the color and water gets on the paper. Do it as much or as little as you want. Its kinda fun, but a little messy.

Then let that dry and you can frame it and hang it up!!
ENJOY!
If you want I scanned in my photo and then added some other elements using my computer.
But like I said you can always just buy one too!


We Linked up at:

