
First off let me introduce you to one of my very best friends.
Jess.
 |
| This is Jess, in Iceland, in front of a glacier. Amazing. |
Simply she is amazing, and even though it isn’t 100% true, she likes to claim she was the matchmaker for my husband and I.
She is funny, brilliant, and we’ve been best friends since 7th grade when we met in German class and were in our ridiculously awkward middle school age state together thus instantly become friends. We were even roommates in college for a few semesters and then I had to go and get married.
Well she has been working over in Afghanistan for the past two years in an Education center for the troops.
AND now she is back in the states!
Now put your hands in the air and shout hooray!
I’m very excited she is back, AND visiting me for the weekend, AND she got to FINALLY meet my baby girl.
They are now best friends.
Anyway Jess wanted to get some cute new clothes now that she is home and we decided that some cute boot socks were in order.
And so we made her some.
You’ll Need:
Knee high socks
Lace
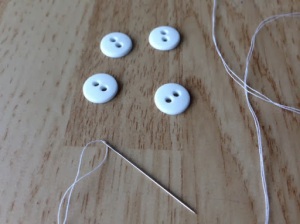
4, 5/8 inch buttons
black and white sewing thread


black and white sewing thread
First you’ll want to start with the lace and socks. I got some regular black socks from the store, making sure they are “knee high”.
I wanted some really thin lace so that it wouldn’t make it too bulky on the socks.
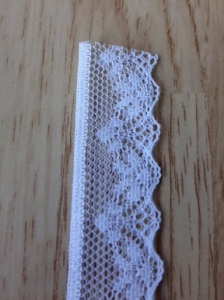
Have you seen the lace that comes in the small plastic sphere type things, usually on the very bottom shelf at Walmart that is like a $1? Well thats what I use.

The lace looks something like this. This lace is perfect because it is so thin that it can be folded in half when sewn to add a little more lace but still without the bulk.

For the thread use white for the spool and black for the bobbin. This makes it so that the black tread will blend in with the socks, since the sock will be on bottom when sewing and then put white on the top so that it’ll blend in with the lace.

If you purchased the same lace I did, fold the lace in half.
Now for the socks. The socks should already have been folded so that there is a front seam and a back seam. The lace will go all the way around the top and then down one side of the sick about 1/4 of the way from the back/heel side of the sock.

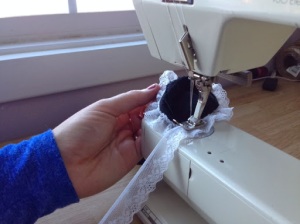
For the first sock put the lace on the inside of the sock about 1/4 of the way from the back/heel side.

Put it underneath the presser foot, straight stitch, and for the width I did about a 2.5.
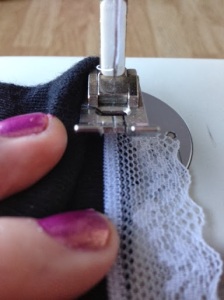
Sew a couple stitches and then leave the needle down, this will make sure the socks stays in the same place for the next step.

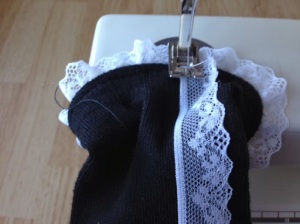
While the needle and presser foot is down, stretch the front of the sock letting the lace lay gently on top. Then lift up the sock behind the presser foot and stretch that back as well.
You should have a long that portion of the sock stretched as far as it will allow.
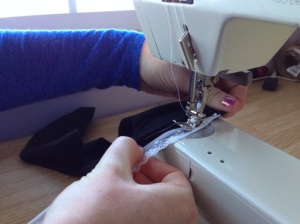
While the sock is stretch begin sewing the lace, making sure to let the sewing machine put the fabric through itself, do NOT pull the fabric through. If the fabric is pulled through it’ll create uneven stitches and make it look less professional.
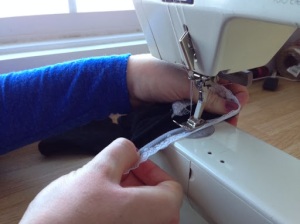
Sew in sections. What I mean is, sew, leave the needle in, stretch the sock, sew the lace until you get to the last part that is stretched. Then do it again until the whole top of the sock is sewn with lace.
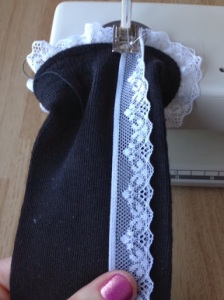
Once you’ve made it all the way around the sock, lift the presser foot and turn it so lace can be sewn down the side of the sock. Simply fold over the lace while you are moving the foot. You want the lace part to be towards the back or the heel of the sock.
Then sew a straight line down as far as you want the lace to go down. I found I like it to be about 4 inches down.
This step cam be a little tricky since the sock is a smaller tube so take your time and dot a little at a time making sure not to sew the other side of the sock.
Then repeat the same thing to the other side of the sick but making sure the lace that goes down is on the opposite of the sock but still towards the back/heel.
You want the opposite because when you put them on you want the lace to go down on the outsides of both of your legs.
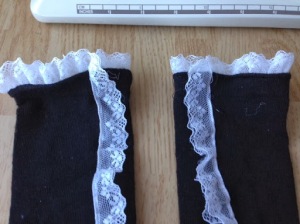
So then you should have something that looks like this.

Next with a needle and thread, sew of two buttons right by the lace what was sewn on the side of the sock.
For a slightly different look, add 3 buttons to each sock.
For a slightly different look, add 3 buttons to each sock.
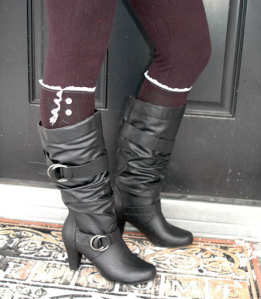
And FINISHED! Didn’t they turn out great? So cute! Enjoy!

We Linked up at

