My favorite kind of projects are the ones that look a lot more difficult than they really are and they turn out super cute. Well this is one of those projects.

Once you realize all it is, is circles glued together then it becomes a whole lot simpler!
So I know it is just circles but I made a pdf of a few different sizes so all you need to do is print. I didn’t use all the sizes but then again all the different size flowers will make some awesome headbands. OH the possibilities!
Download Flower Headband Circle Pattern

Yum Yum! Yogurt! I can’t get enough of her, She is so cute!
Materials:
felt
elastic
hot glue gun
needle and thread
bead or button for middle of the flower
First you’ll want to decide how many layers to the flower you want, for mine I wanted 3 layers, so I used 3 different size circles for the flower petals. Then I took one size bigger than my largest circle and cut two more circles. These will be used later for the backing of the flower.
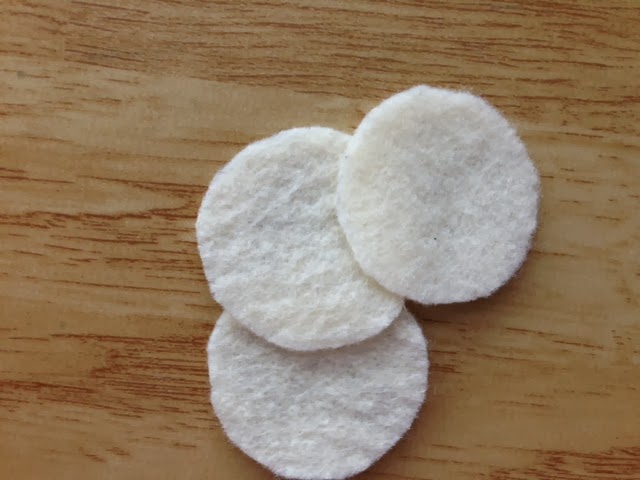
I cut (see my pdf download)
5- #2 circles
5- #3 circles
5- #4 circles
2- #5 circles
total: 17 circles

After cutting you’ll want to start with a set of 5 circles. For each set you’ll do the same steps. I started with the #4 circles. You’ll want to overlap them slightly and glue them where they overlap.
(Use just a small amount of glue, you don’t want the glue coming through the felt. I’ll show you what I mean when we get to the next size flower.)

Next you’ll want to put the next circle on slightly overlapped the last one, but starting to form a circle. Glue.
Repeat the last step again, overlapping slightly, glue, forming more of the circle.

Repeat again, slightly overlapping, gluing and finishing the circle. Now the last circle should be overlapping the first circle. To keep the flower looking all the same we want the first circle to overlap the last circle. So lift up the first circle and bring it to the top.
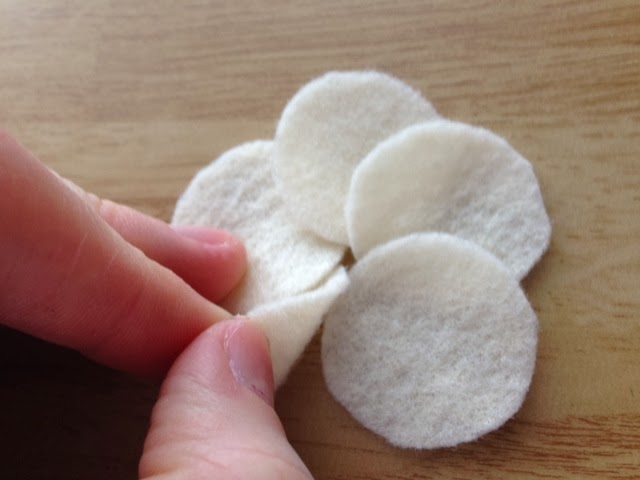
Put a little bit of glue…

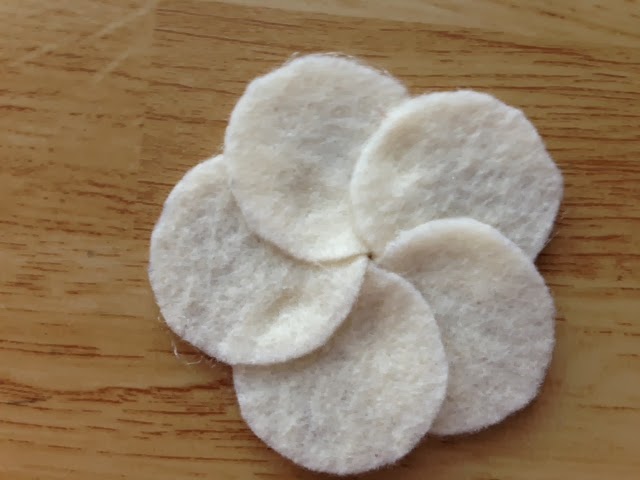
And you’re done with this flower! All the petals should stay in place.
Now onto the next size flower. We will do the EXACT same steps, overlapping and gluing.

And now you have your second flower.
(Here is where I added a little too much glue on one petal and it seeped through, see on that bottom most petal on the right side? Good thing we can cover that up later!)

And onto the third flower. Overlap, glue, overlap, glue… you know the drill.

Yay! Our third flower!

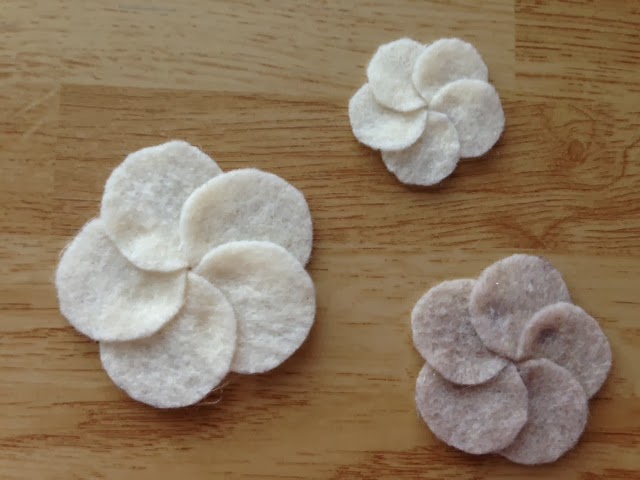
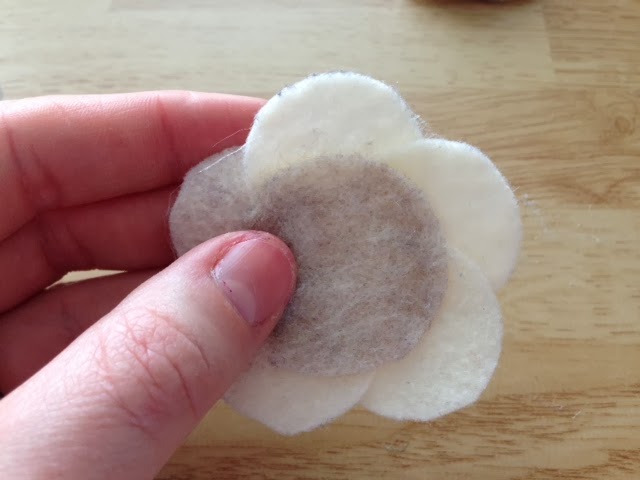
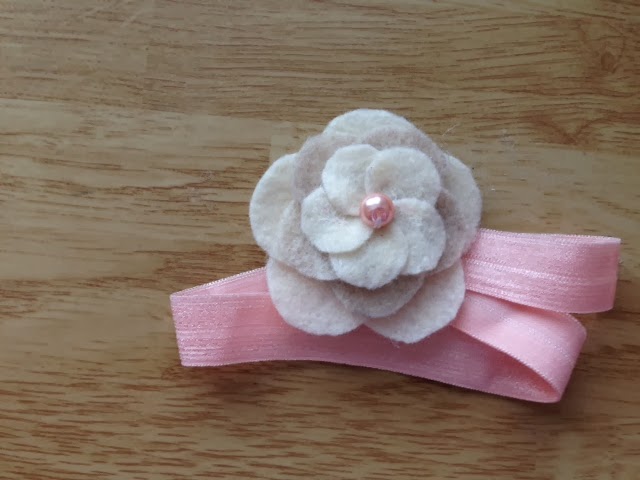
Now we have 3 different size flower. Don’t these look awesome? Eek I’m so excited already!
Now we stack them. Big flower underneath the medium flower.

Then little flower on top.

Here is where the other larger circles come into play. Put a little bit of glue on just the outside of one of the circles.
Make sure there isn’t any glue in the middle, we will be sewing on a bead and we don’t want to try and have to get the needle through glue, thats no fun.
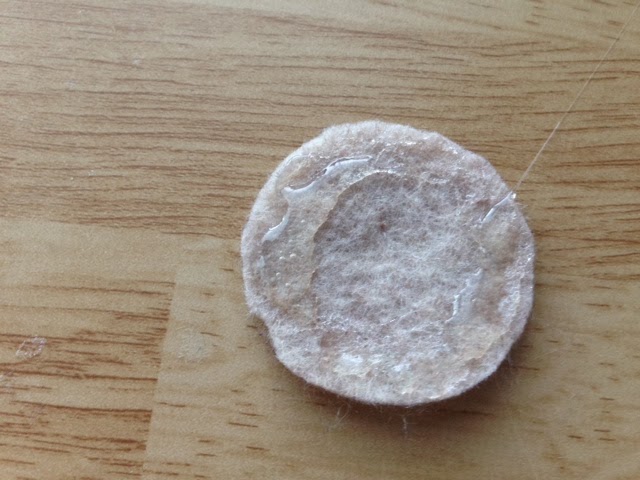
And put it on the bottom side of the stack of flowers.
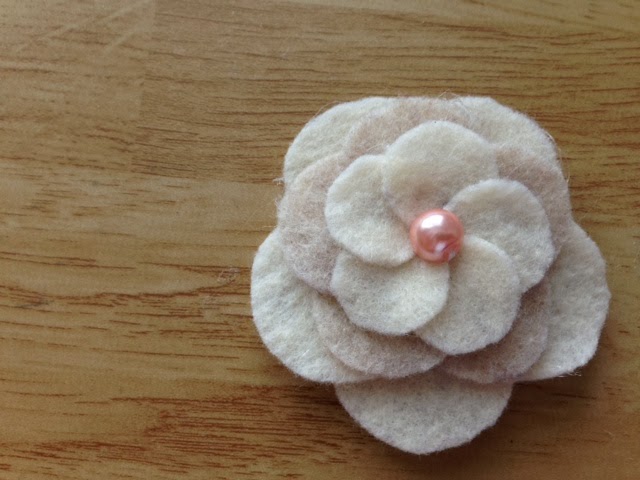
Now to the needle and thread. I was thinking that if you didn’t want to sew on the bead then you could easily glue it on. I wanted to sew mine on though because then I could pull it down a little and make it tight, making it look a little more like it is in the flower rather than on top.

I just tied a knot, when up through the middle of the flower, through the bead, and back down pulling tight and knotting it off. Didn’t it turn out cute?
Next get your elastic. Measure how long you want it, and cut it an inch or two shorter since it’ll stretch.
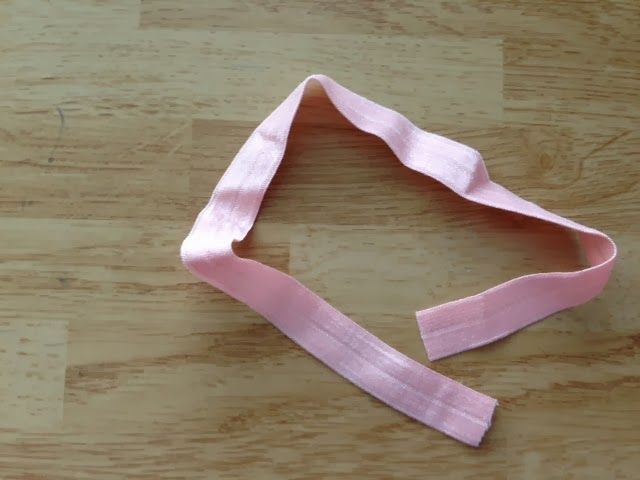
Add a little bit of glue on the end.

Glue on the other end, forming a circle. Make sure not to have a twist in your elastic.

Glue the seam of the elastic on the back of the flowers.

Put a little more glue on top of that…
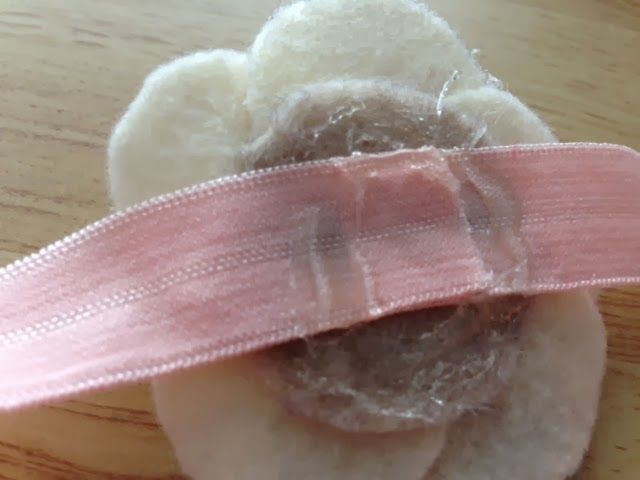
And attach the last circle. Now you can’t see the mess of the glue and elastic that was there, and the added outer layer will make it nice and soft against the head.

Didn’t it turn out so cute?
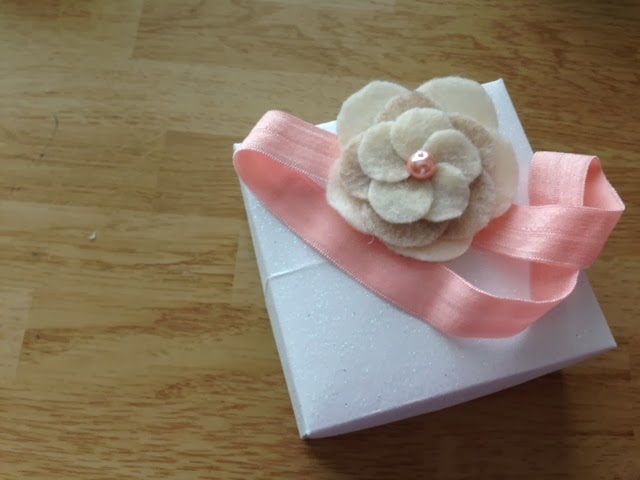
You can even make a box and gift wrap it to a friend!
And my cute little girl wears it so well!
Now she just need to keep it on.