Butter Cookies and a Merry Christmas

First off-

This is going to be the last post until after the holidays. Chelsea and I have decided to take some time off, spend it with our families, and just enjoy a little break!

But before we sign off for a few days I wanted to share a family recipe with you.

One tradition that has stuck with Dave, my husband, since he was little, and we have kept it going is his mom’s butter cookies. I don’t know why we only make them around Christmas because they are SO GOOD but it’s always been the tradition.

If you know Dave at all, you know he is a Star Wars nerd, so one year for Christmas my mom got Dave some Star Wars cookie cutters, from Williams Sonoma. Then when another set comes out I always make sure to get it for dave. (There are 3 sets, 1, 2, and 3.) 


Anyway, so not only have butter cookies always been a tradition but then the Star Wars shapes were added to the tradition since they were Christmas gifts too.

So on to the good stuff!

Butter Cream Frosting
 
2/3 cup soft butter
1 pound box powdered sugar
1/4 cup milk
1/2 tsp vanilla or almond extract
Food Coloring

 
Whip butter until soft
Gradually add sugar & milk until smooth.
Add flavoring and color.
 
 
Old-Fashioned Butter Cookies
 
3 cups flour
1 tsp baking powder
1/2 tsp salt
1 cup butter
3/4 cup sugar
1 egg
3 tbsp milk
1 1/2 tsp vanilla
 
Sift together first 3 ingredients.  Set aside.
Cream butter and sugar together.
Add and mix in egg, milk, and vanilla.
 
Gradually mix in dry ingredients.
 
Wrap dough in wax paper.
Chill at least 1 hour for easier handling.
Roll out on floured surface.
Cut into cookie shapes, 1/4 inch thick.
Place on ungreased cookie sheet.
Bake at 350 until just done, 5-7 min.
Frost with butter cream frosting.

Sprinkle with decorations.  YUM!


Enjoy and Merry Christmas!!!


Ornament Gift Boxes

You know when you are crafting and things just don’t work out and it takes you a few tries to get it right EVEN THOUGH you’ve done it a million times? Well this was one of those times. Now don’t let that make you feel like you can’t make these. Because they are a simple as pie, I was just having an off day. And these really are as simple as pie, like the pie you buy from the store and don’t have to make.
Even though it took me a couple tries, they are so worth it! AND I figured out my mistakes so as we go I’ll also tell you what not to do and what helped me.
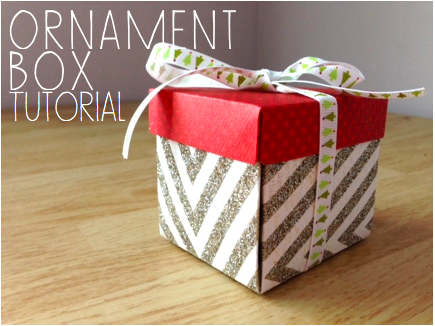
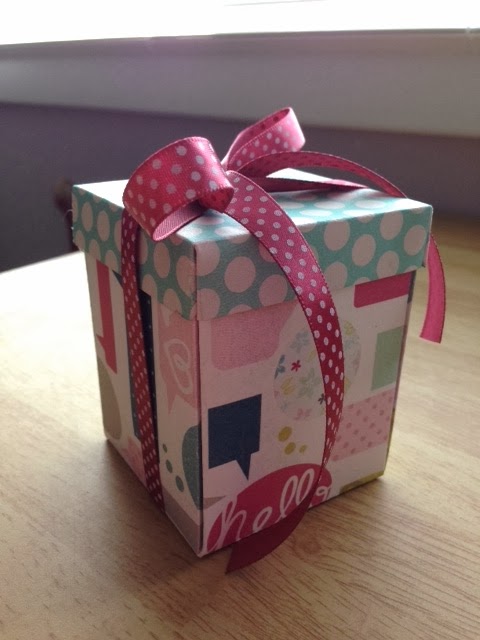
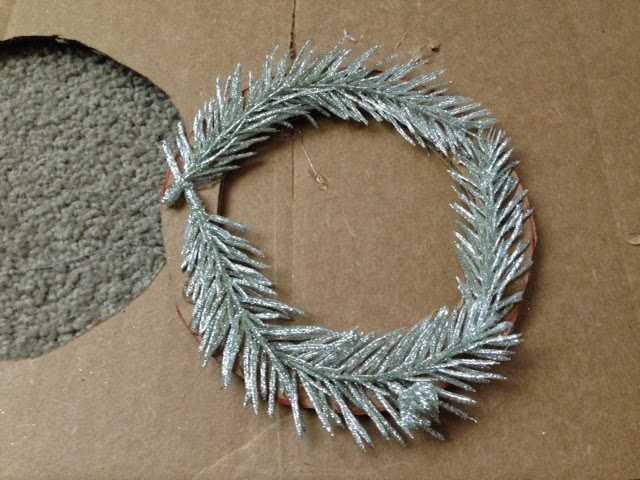
Don’t they look awesome?
Well let me show you how you can make some awesome boxes too!
How to make the box
Supplies:
Pencil
Plastic mechanical pencil for scoring or something similar
Ruler
8½ x 8½ inch piece of paper for the box
2¾ x 2¾ inch piece of paper for the lid
Glue (I used a hot glue gun, but something like Elmer’s glue would work too)
Optional: ribbons, bows, whatever to decorate the box afterward
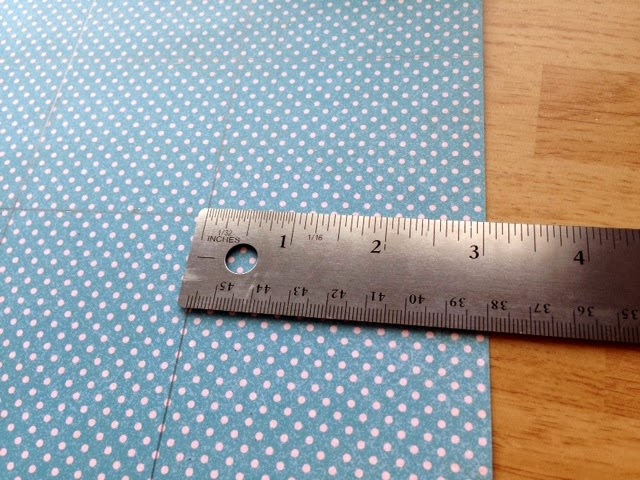
First you’ll want to start with a square piece of paper. Mine is 8½ x 8½ inches. The thicker the paper the more stable your box will be. I started out with a piece of copy paper just to see how it would work out. It worked great but it makes for a flimsy box. 
Start with the side that you want to be on the INSIDE of the box. Then I measured 3 inches in from the side, then marked a line. I usually make a 3 inch mark on the bottom half of the paper, then one of the top half, also 3 inches. I then connect the two marks, making a line. Do this on all 4 sides.
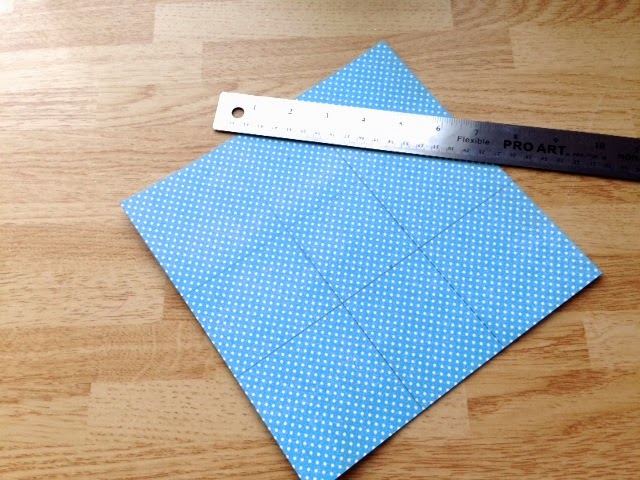
You should then have something that looks like this. I didn’t realize marks on polka dots wouldn’t show up as well when I took a picture, so I went over them with a line tool on my computer. Now you can see them better. Essentially we’ve divided the paper up into 9 sections. The middle should be a 2×2 square, this will be the base of the square.  
 Now we are going to add a couple more lines. Each corner square we are going to divide in two triangles. Just like we are going to be cutting off the corners (because we are). If we start with the top right, small square, we will draw a line from the top left, diagonally down to the bottom right, again staying within that small square.
For the bottom left square we will make the same line. Draw from the top left to the bottom right.
Then for the top left square and the bottom right square we will draw the opposite- 
draw a line starting at the bottom left and go up to the top right.
Here is what we are looking for. I made it a bit larger so you can see better.

Now snip of those corners using the lines that you just made.
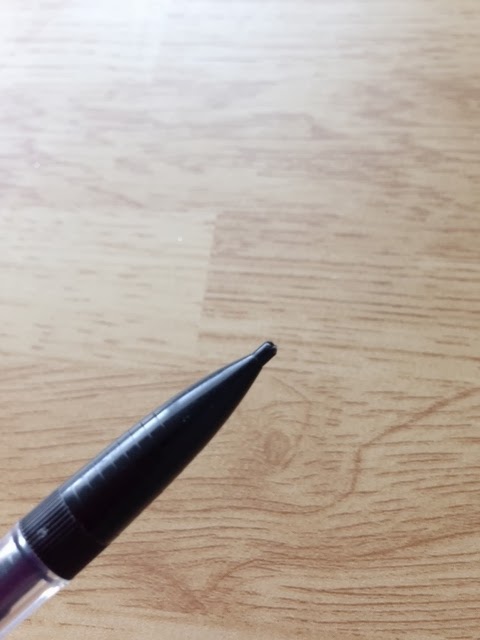
Now here is where I was having trouble the first time I started. Since I am using a thicker paper it didn’t fold so nice. To help with that, I recommend scoring the paper, it will fold much easier and the lines will be crisper. Scoring is basically making a dent or a slight crease in the paper where you want to fold it before you fold it. 
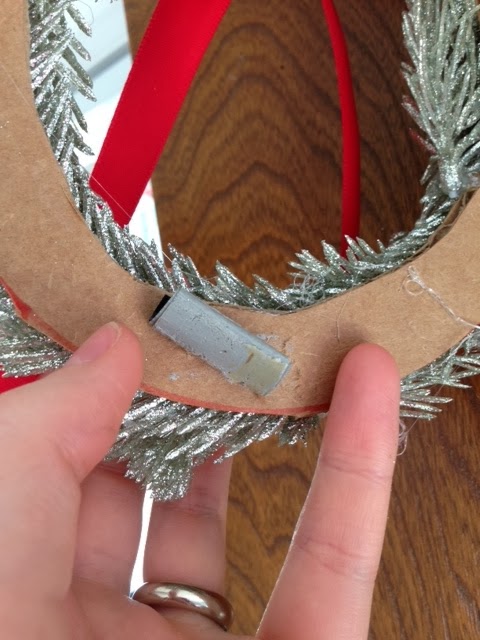
I do have a nice little tool for scoring but of course I couldn’t find it. So I used a mechanical pencil WITHOUT the led. I didn’t want to make any more lead marks so I took the lead out. I wanted just the small plastic part. If you have a mechanical pencil that has a metal tip, it might work but just make sure not to scratch the paper.

Next I scored the paper on the lines that we already made, this is where we will be folding and I want nice clean straight folds. I lined up the rules again on the lines, then I ran the plastic part of the pencil along the ruler side. I made sure I pressed firmly so that there would me a crease where I put the pencil.

Once I scored the 4 lines, BEFORE I folded, I erased the lines. I found out once I folded it was hard to get in the creases to get ALL the markings erased. But at this step you no longer need the lines because the score marks are there.
Now begin folding on all of the score lines, you should have 4 folds.  
Take your time and make straight nice folds. Work with the paper. The first few attempts I made, I was trying to be quick and in turn my folds looked sloppy and then the end box doesn’t look as nice.
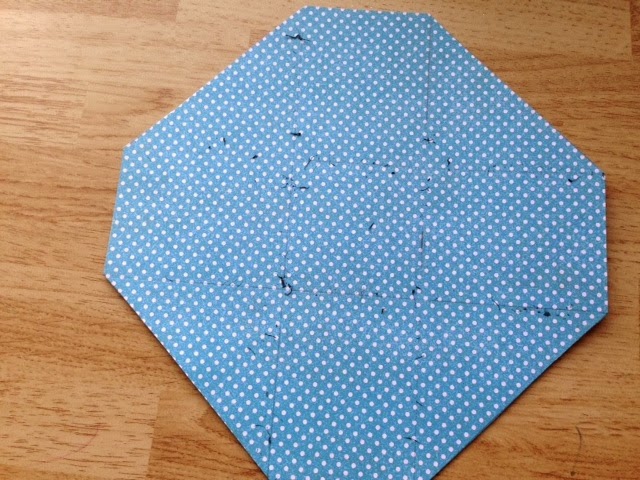
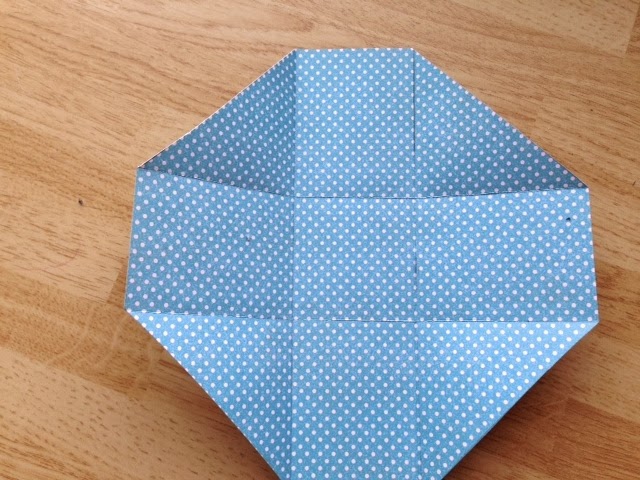
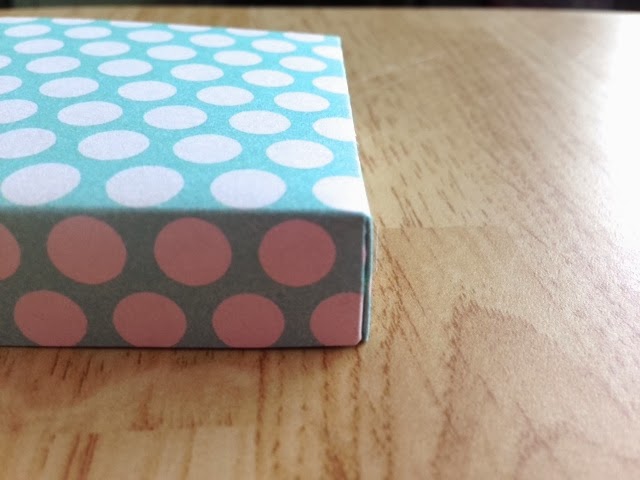
After you are done folding you should have something that looks like this…
Now here is the trickiest step. And it really isn’t that tricky, it is just tricky for me to explain.
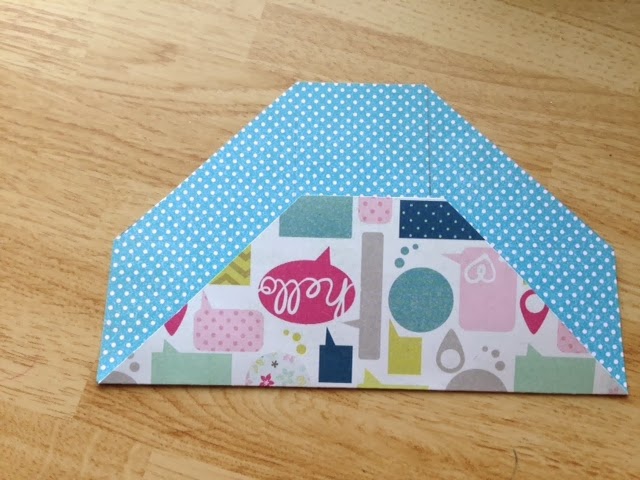
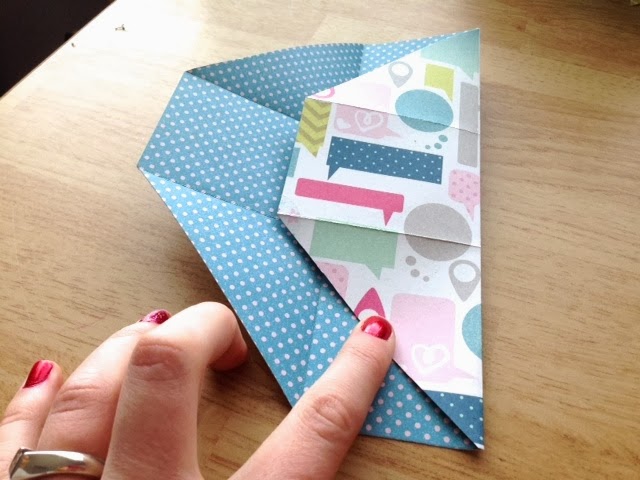
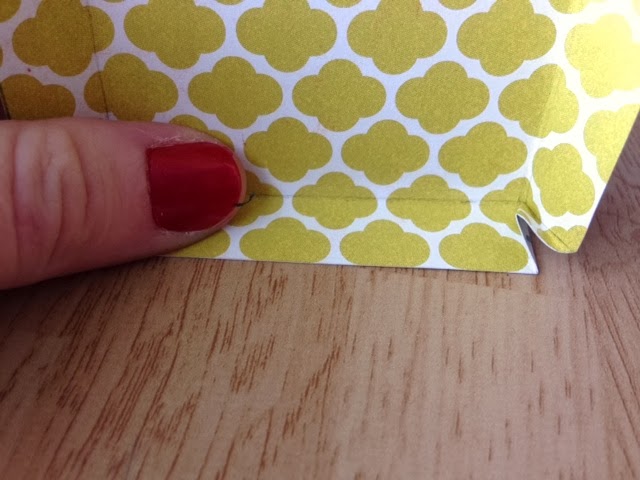
Fold one side over, where you have already made a crease, like I show you in the first picture, holding a finger in the middle of the triangle shape.  
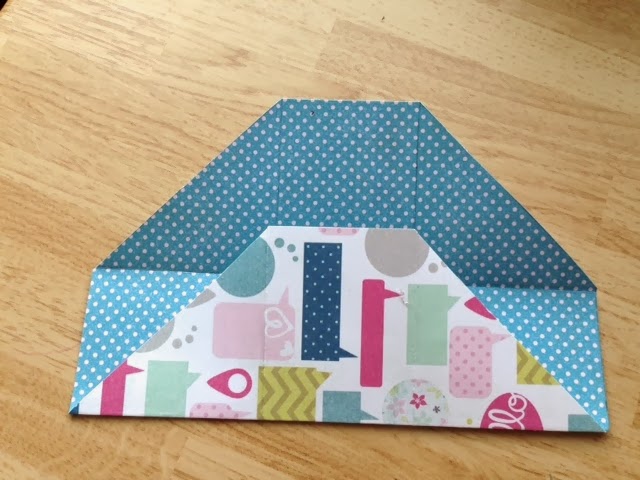
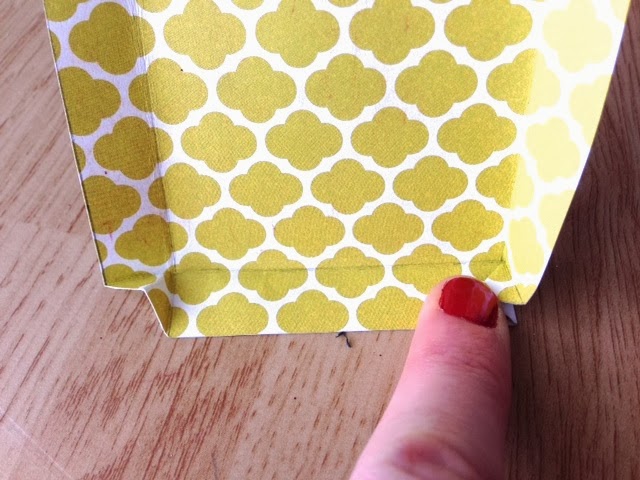
Next, you’ll lift up the top part of the paper and put the two folds together. I marked the folds in the second picture, line those two up so they are right next to each other, side by side.
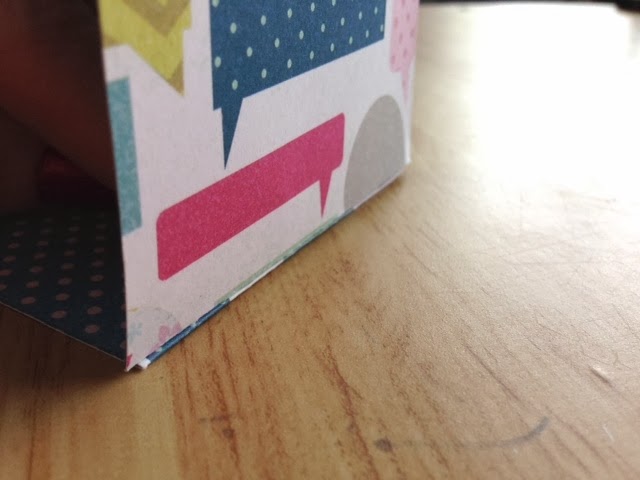
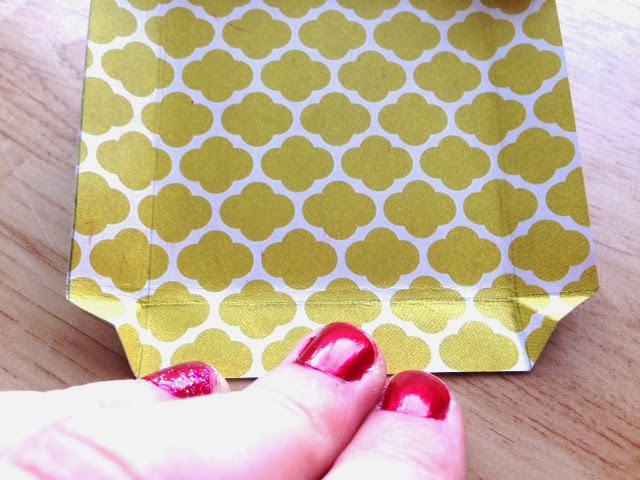
Now you should have something like this. This will be creating the first corner to your box. The first picture is what the outside will look like, and the second picture is what the inside will look like. You will want to crease the paper on the inside where you can fold it flat. It will create a triangle that pops out from the corner.
You will continue folding each corner just like this until all corner are folded. When you let go you should have something like this.

PERFECT! You are now done with the box part. Now on to the lid, which is done the exact same way but involves a little glue.
How to make the lid!
Again we will start with a square. My square is 2¾ x 2¾ inches, including the ¼ inch lip for the lid.

If you are making a different size box here is the math to how I got the number for the lid. IF you are making the same size, skip the next little paragraph.
(Here is how I did the math: We know that the base/bottom of the box we just made is 2×2 inches, but I want the lid to be just slightly bigger than the box so that it’ll fit on top, I added 1/8 of an inch all the way around. So the base square of my lid will me 2¼x2¼ inches. The one forth came from the fact that I wanted 1/8 extra all the way around, so I had to add it twice since there are two sides when measuring across the square. I then wanted the lip of the lid to come down ¼ of an inch on each side. So again since there are two sides I add ¼ twice, which is ½. So the square base plus the lip is 2¾ x 2¾ inches. OR Take the base square size from the box, add ¼ to make it fit, then add however big you want the lip x2)

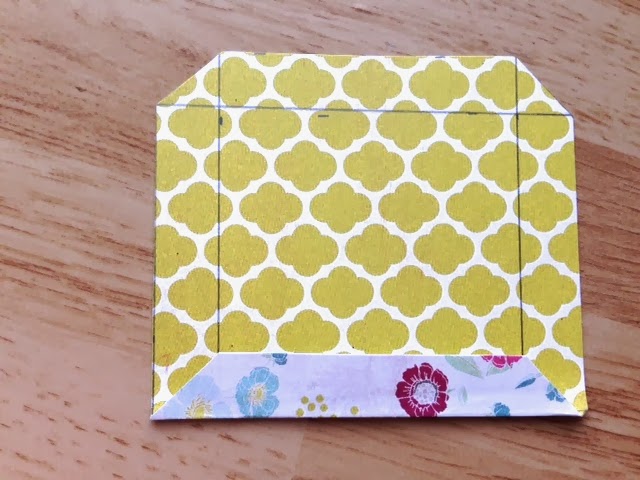
Next we are going to measure ¼ inch in, on all the sides. I then marked the corners as well.
The next few steps are JUST LIKE THE BOX. 
I combined a few steps so there aren’t a zillion pictures on this post. If a step seems confusing refer back to the box if you need some extra details.
I then cut off the corners, and scored the paper where the lines were. (I forgot to erase my marks here! Oops!)

Then I began folding

Now the tricky corners again! Fold the corners in to make a triangle, and putting the two outside creases together.
Crease the little triangle on the inside.

Finish doing it to all the corners.

Now comes the glue part
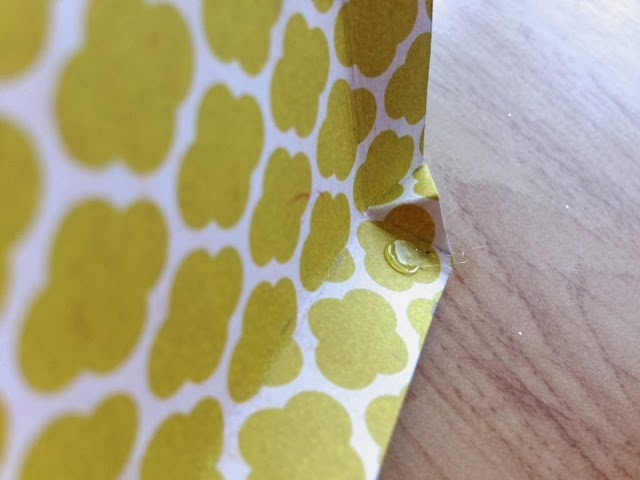
First you’ll add a little dab on glue on the inside of the lid right next to the corner triangle you just made. (I used hot glue but elmers glue would work too). Then press the triangle down on top of it.
It should look like this… Then I added a little more glue right on top of the paper that I just glued down. Now bring up the paper with the new glue and hold until the glue has set.
You should now have a nice clean corner. Repeat on the last 3 corners. And you’re done with the lid!
Putting them together
The lid might seem a little tricky to get on the box but just be patient with it. Maybe try it first without adding anything inside the box. With both hands fold up the box again so all the sides come together, get it situated to that one hand can old most of it together. Then you can drop in your ornament or other little present.
You could add all sorts of things in there though. Candies. Cookies. Another homemade present. Homemade coupons… Oh the possibilities are endless.
Then pop on the lid. I found it easiest to add the lid one side at a time. Make sure one side has the box inside it, then the next side and then it just seems to slip right one.
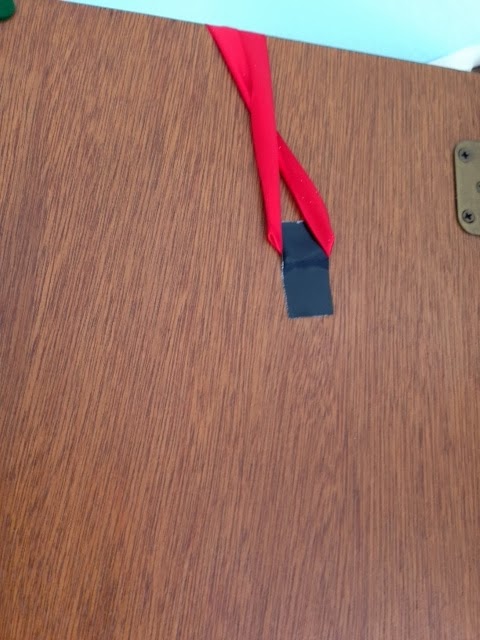
Then you can add a ribbon or a bow or whatever else you want!
Then make some more! So many color choices and paper varieties.
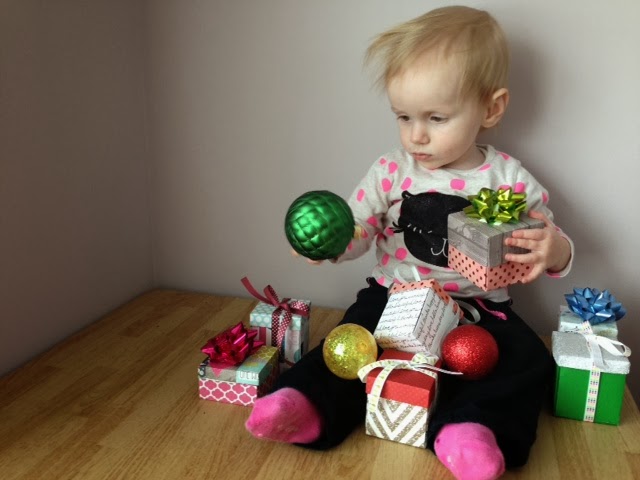
And just because they are the perfect size for little fingers… I couldn’t resist.

Thanks for stopping by!

Etching Glass

So, apparently I’m on an etching kick because I etched some mason jars this week.
I saw some cute jars at the store the other day, but couldn’t bring myself to buy them. 
So I decided to just etch my own–and that way I can personalize them.
This was my first time etching glassware, so I did some basic designing at first–labeling jars and whatnot.
The more I got in to it, the more I figured out different ways to get different designs.
I had SO much fun with this project and now I have some awesome jars and glasses to use!
After you get started on this project, you’ll find what materials works best for you. 
The basic things you’re going to want to have to start out with:
Contact paper or painters tape. (I used both and found that they both work pretty much the same…although I like the painters tape better), scissors, etching cream (I bought a little jar of it at Michaels-it came with a little tiny brush to spread it on) an x-acto knife, a jar or glass container of some kind, imagination and some letter stickers. 

First, I washed the jar, and made sure it was clean and didn’t have any fingerprints on it. 
Then I put the letter stickers on, and taped off the areas where I wanted to etching cream to go.

I squeezed a few globs of the cream on and spread it all around with the little brush.
You want to make sure you spread it around evenly, and make sure the layer is thick enough to cover the whole area.
I let the etching cream sit for about 20 minutes before I took the tape off the jar and washed the cream away.

I thought the stickers and the painters tape worked really well. I had clean, crisp lines when I washed all the cream off the jar.

 Then I started having fun with the contact paper–cutting out different shapes and designs. With the contact paper I found that you really need to press down when you stick them on the jars so they give you clean lines when you take them off.
Also…after the first few jars, I realized I was doing it the wrong way. Well, not wrong, just the hard way. For the little leaves I made, I was cutting out the shapes first and then sticking them on the jar. But I realized it would be SO much easier to stick the tape or contact paper on the jar first, then cut out the shapes directly on the jar.

It worked so much easier to cut the designs right on the jar. i don’t know why i wasn’t doing that in the first place. I was able to do more detail work and I love how they all turned out!
This was such a fun and easy project…and now I have more jars than I know what to do with.
Good thing it’s Christmas time and I can give a ton away as presents!!

German Stollen Bread

aka the best thing you’ll ever eat in your whole life

My mom makes this stollen bread every year for Christmas. It’s super delicious and the recipe she uses makes three whole pan fulls! Perfect for making for friends or to take to holiday parties. Or, if you’re like me-just hoard in your kitchen because December calories don’t count.

Ingredients:

For the topping mixture you’ll need:
2 cups chopped walnuts (or pecans are yummy too)
2 cups sugar
2 tsp maple flavoring
4 tsp cinnamon
(Go ahead and mix all of these ingredients together and set this mixture aside)

About two sticks of butter–you don’t need to add this to anything, you’ll melt it later, so set it aside.

For the bread you’ll need:
3 cups warm water
1/2 cup sugar
9 cups flour (approximately)
3 tbs yeast (I use the instant SAF yeast)
4 eggs
3 tsp salt
4 tbs oil

Mix the ingredients for the bread with only 2-3 cups of flour at first. Beat it all together with a mixer until everything is combined. (My kitchen aid can only handle so much so I also mix it all with a wooden spoon to combine everything if the mixer doesn’t get it all.)
Then add the rest of the flower a few cups at a time. You may want to add it in with the spoon rather than the mixer-you don’t want to over beat the dough.
When the dough is easy to handle, and not sticky, you’re ready to shape your stolen bread.
Divide the dough into 3 equal parts.
Grease 3 large (14 inch) pizza pans. I used the disposable ones you can get at the grocery store. They usually come in a three pack so its perfect.
Divide each of the dough balls into three more equal parts–so altogether you will have 9 balls of dough.

You’re going to roll out a ball of dough into a circle, roughly the size of the pan.

It doesn’t have to be perfect, just smush it all around until it fits.

Add a layer of melted butter. Spread it around with a spoon and make sure all the dough is covered.

Then you can add a layer of the topping mixture. 

Then roll out the next ball, place it on top of the first layer of dough, add more melted butter and topping mixture–and then again with the third ball of dough.
Once you have all three layers on the pan, you can set it aside and repeat these same steps for the next two pans. Each pan has three layers of dough, butter and topping mixture.
Now for the fun part!
Take a cup, place it in the center of the dough and press down.

Then you’ll take some scissors and cut the layers so there’s about 16 little sections. Don’t cut all the way through to the center, you want to leave just a little bit so they don’t completely break apart.

I found it easy to section it off into quarters first so the sections stay pretty even.

 It’s so pretty!

 Now start twisting each section. I twisted each part three times, all going the same way.

It’s alright if they don’t look perfect–you have two other chances to perfect your twisting skills. When you’re all done, let each pan sit for for a few minutes to rise. When they’re nice and puffy about double their original size, bake them (one at a time) for about 15 minutes. If you want to be exact, I baked them for 18 minutes. Just until they’re a nice golden brown.

The last step is the butter cream frosting. Add 1/2 cup of softened butter, 1 tsp vanilla, 2-3 cups powdered sugar and 1 tbs milk (or a little more if needed) all together. Mix these ingredients up until all the clumps are gone. You can add a little powdered sugar and milk as needed. You don’t want a thick frosting-you want to be able to drizzle it on, but still be able to stick to the bread.

Drizzle the frosting on the bread while it’s still warm and then dig in!

It’s SO delicious, and it makes your house smell heavenly. When I first made this recipe I had a ton of questions. I would ask my mom about every 30 seconds if I was doing it right.
So if you have any questions, feel free to ask!

Enjoy!!!

Go check out the link up party over at Home Stories A to Z!

All Things with Purpose

Christmas Accent Wreath

For awhile now I’ve been thinking of a way to add some Christmas decorations to my kitchen. I really don’t like things on my counters so I didn’t want to put decorations that sit on the counters. I also don’t have any space above the cupboards because of how the house was built so I was a little stumped. Then my love for wreaths popped in my head and I decided to make a few small ones to put on the front of my cupboards to add that Christmas touch! I am so excited on how they turned out!

You will need:
Cardboard
A bunch of fake garland/leaves
Hot glue gun and hot glue
Razor
Ribbon
Tape
Matches/lighter to burn the ribbon ends
This whole project cost me less than $15. I already had most of what I used, like an old box for cardboard, hot glue and the gun, matches, the razor, and tape. The only things I had to buy new were the leaves, which I got 14 bunches, 4 for each wreath. Those cost me a little over $10. I also bought the ribbon which was like $2.
So here is how its made!
First I found something that was round that was about the same size that would fit my cupboards. Turns out a had a little bowl that would work perfect.

 I wanted 4 wreaths so I made 4 circles, and then cut them out with a razor. (Remember to cut on something that its ok to get some razor marks, I was being carful so I just did it on the carpet in our spare room.)
Here are my circles.
I then needed to cut out the middle to start the wreath shape I wanted. I was going to make another smaller circle and cut along that circle but I couldn’t find anything that was the right size so I kinda just winged it. I wasn’t too worried singe I was going to be covering them up with the leaves anyway.

Next I took the leaves. I bought 16 bunches of leaves, 4 for each wreath. I thought maybe 4 would be too much but I wanted a full wreath and didn’t want to be able to see any of the cardboard that I used. 4 turned out to be the perfect number for these.
 I then pulled apart all the leaves so that I could glue them on one by one. I also didn’t want to have the extra wire from the stem.

 Here is my little pile from 4 bunches, so this would be for one wreath.

Next comes the hot glue! And more hot glue and more hot glue.
  
Now you just need to glue on one at a time. 

And then keep gluing.

Slowing adding more and more.
It’ll start to get full, make sure to cover up all the inside and the outside of the wreath so that you can hide all the cardboard.

Then when you’ve used all of the leaves you’re done gluing for this wreath.
Next  took some red ribbon. I measured it so that it hung halfway down the front of the cupboard and long enough so that I could tape the back to the other side of the cupboard, and then make sure to add a little extra for the bow. I cut the ends and melted them with a match so they wouldn’t fray.

I showed my husband and he suggested I put a little bit of tape on the back of the wreath that sticks to the cupboard so that when you open up the cupboard they doesn’t move around and get in the way. What a good idea! (Thanks, Dave!)
I think they turned out great! I love the extra color it brings to my kitchen.

Thanks for stopping by!