Seriously.
This is one of my very favorite comfort foods.
Reminds me of home.
Cold winters.
Snow.
Snuggling in blankets with the family while watching a good movie.
It’s the smile on your face when you walk into the house and smell something delicious.
Even just thinking about this bread makes me smile.
It really is the best bread ever!
So soft.
So delicious.
Melt-in-your-mouth good.
And I have to thank my grandma for it.
She says she doesn’t remember if someone gave her the recipe or if she adapted it, but either way it’s a family favorite.
I just love stories about my ancestors so I thought it would be fun to share a little story from my grandma about this recipe.
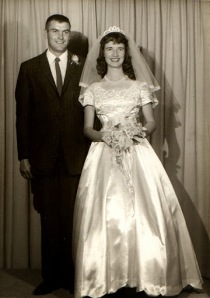
My Grandma her senior year and my grandparents on their weddings day
From the mouth (or from the text messages, yes my grandma is awesome and can text) of my grandma:
“I started making bread for our family when I was 10, using a booklet put out by the Home Extension service of the State of Idaho – very scientific and thorough. I made 6 large loaves every Saturday. When I first tried, my dad told me it was as good as his mother’s (My great-great Grandma). When he said that I was totally hooked. When I went to BYU, I continued to make bread every Saturday, but always made one loaf into cinnamon rolls. That is what attracted Grandpa (my Grandpa). Him and his roommates would come over Sunday evenings because they knew we had homemade cinnamon rolls.”
Anyway on to the bread! It’s so good!
…….
………..
White Bread
yield: 2 loafs
1 2/3 cups lukewarm water
2 1/2 tsp yeast
1/4 cup oil
1/4 cup sugar
1/4 cup non-fat dry milk
1 /34 tsp salt
4 cups flour
In a small bowl, combine yeast and water. Leave for about 5 minutes to soften. In another bowl combine oil, sugar, dry milk, and salt. Mix well. Add yeast mixture once it has softened. Add flour, mix and knead. Dough should be slightly sticky to the touch.
Cover dough and let rise until it has doubled in size. Knead.
Pinch in half and form two loafs. Place in lightly greased bread pans and let rise until they have doubled in size. Bake at 320 degrees F. for about 30-40 minutes, or until golden brown on top.
………..
……
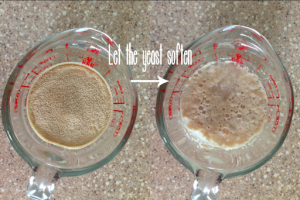
Combine 1 2/3 cups lukewarm water and 2 1/2 tsp yeast in a bowl, or a measuring cup.
Let the yeast soften for about 5 minutes. Softening happens when the yeast is in lukewarm water, so it is really important it is just lukewarm. Not too hot and not too cold, but just right Goldilocks.
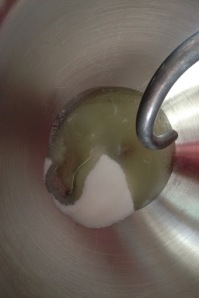
Meanwhile in another bowl combine the salt, sugar…
oil…
and powdered milk. Mix. Then add in the yeast and water mixture when it is softened enough and mix.
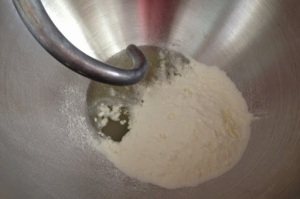
Add the 4 cups flour.
I usually add about 3 cups and let it mix well. Then I add the last cup gradually making sure that the dough doesn’t get too dry. Usually I end up adding about 1/4 cup more though. It all depends on your altitude. So add just enough to make the dough slightly sticky.
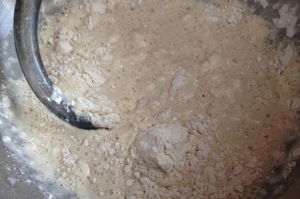
Once the dough is mixed well, cover.
Wait until the dough has about doubled in size, which is usually about an hour or so.
That also depends on how warm your kitchen is. The warmer it is the faster it’ll rise.
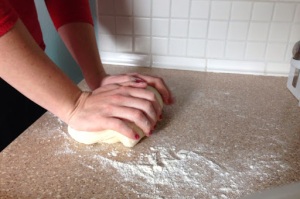
Then take out the dough and knead. Knead until all the bubbles and air pockets are out.
Then it’ll be a nice ball of dough!
Since this recipe makes two loafs, pinch the dough in half. Don’t try and pull the dough apart, pinching is much easier.


Then form the two dough balls into a loaf shape.
Place into lightly greased bread pans.
Cover, and set aside to rise again.
Then once it has about doubled in size again. Pop in the oven.
Then bake until they are golden brown which is usually 30-40 minutes in my oven. I’ve learned that every oven is different, so you might have to cook it slightly more depending on you oven.
Then cut, butter and ENJOY, or put on some Nutella, or jam or nothing at all. And I mean ENJOY! This bread is amazing. And my family usually ends up eating it all just with a little bit of butter before we can use it for a sandwich or something.
(I actually cut one of these open and realized it wasn’t all the way done, so I put them back in the over for another 10 minutes, about 40 minutes total. So they ended up being a little more golden brown than in the picture.)
We linked up at


