Happy St Patrick’s Day!

Every year my mom would make our St Patrick’s Day breakfast extra special by dying everything green. On Valentine’s Day, everything would be red, and on Halloween, we’d have purple pancakes, blue eggs, and orange milk. I loved growing up with this tradition in my home. When I moved out, I’d do this for my roommates, or just for myself because having a regular looking breakfast on such an important day didn’t seem right.

Also, this is the last week of the drawing challenge! How have you guys been doing with drawing and/or doing awesome creative things? My sketchbook is almost full and I’m excited that I have few new ideas that I want to push further. This challenge was a very much needed break for my creative juices build up. And this week, I’ll be in Utah, so a change of scenery is sure to bring new ideas into my sketchbook.
I also have some cool ideas for some upcoming projects and I have a few recipes that I can’t wait to share with you guys.
In fact, I’m so excited, that I better sign off and get to work before I spill all the beans.

We’d love to know how you guys have been doing with this challenge. Let us know!

Happy Pi Day-Mini Apple Pie Recipe

Mini Apple Pie recipe for Pi day
Gluten Free Option
I’m so excited about what I’m sharing with you today!!
Mostly because I’m a little bit of a nerd, remember how I majored in math?
And guess what today is? Pi Day! As in the number Pi, 3.14159…. that goes on forever.
And if you are even more of a nerd the word 3.14 written backwards kinda looks like the word pie, so even better.
So in honor of Pi Day, I decided that a pie recipe is in order!
And mostly because I thought of this last minute and was worried that my pie wouldn’t turn out, just because I’m lucky like that I decided to make mini pies! 
One of them was bound to work right?
You’ll need:
a single batch of your favorite pie crust, or I’ve seen some mixes at the store… whatever works.
Filling:
3-4 large apples (I used Granny Smith apples)
1/4 cup brown sugar
1/2 tsp cinnamon
1 Tbls lemon juice
1/4 tsp nutmeg
optional: cinnamon and sugar to sprinkle on top
In a muffin tin fill each tin with rolled out pie dough, to form a mini pie crust. Peel and core each apple, then slice into THIN slivers of apple. In a bowl combine all the filling ingredients and use your hands to mix. Then take some apple slices and jam pack the mini pie crusts full. Once they are baked the apples will become slightly smaller so the more apples the better! Bake at 450 degrees for 15 minutes, then cover with tin foil to prevent the crust from over browning, bake another 10-15. Take out and let rest for 10 minutes. ENJOY!
……..
…..
I first started with a gluten free pie crust mix. I used Mama’s Pie Crust Mix. I used half the mix which according to the bag makes one pie crust without the top. In the end I had about 8 mini pies.
Then fill the muffin tins with pie dough. This doesn’t have to be fancy, turns out little things are harder sometimes, but still taste just as delicious, or even better because small things are just awesome! 
In half of the tins I used muffin liners, half I didn’t. I wasn’t sure which way would be better, turned out it didn’t matter, each one turned out great!
Mini Apple Pie recipe for Pi day
Mix the filling ingredients together and then stuff full each pie with as many apples as you can. The more the better!

       Mini Apple Pie recipe for Pi dayMini Apple Pie recipe for Pi day                   

Bake and enjoy! And have a great Pi Day!!

Make sure to stop by our Facebook page and “Like” us to get updates and join us as we laugh, and talk about our creations and everyday life!
Or if you’d rather just get our post straight to your email we can do that too!
 We Linked up at:

Sketchbook Sneak Peak

Here’s a sneak peak of the new project I’m working on.
I’ve worked on it a little more and I can’t wait to show you guys when I’m done!
I just love it when things work out and I’m not constantly fighting my pencil the whole time.
I was thinking today while I was drawing about the projects I did in college. I had professors, studio time, and was surrounded by other artists. I was able to bounce ideas off of my friends and get help, and I had space to work. But did I care as much about my work then as I do now? Nope.
I was thinking about a few of the projects I did back then–they were all crap. I didn’t care about them and basically just finished to get a grade and pass the class. I remember one particular assignment in my creative perspective class that I was really excited to work on and couldn’t wait to get started. I “never got around to it”. I think my roommates were doing something really interesting like picking their noses or something and I hung out with them instead of working on my project.
I think it’s funny that I could not have cared less about my projects in college, which were for a grade…and now I care so much that I forget to eat dinner.
Oh well. They let me graduate. I must have done something right.
There’s just over a week left in this challenge. How are you guys doing?
Make sure to stop by our Facebook page and “Like” us to get updates and join us as we laugh, and talk about our creations and everyday life!
Or if you’d rather just get our post straight to your email we can do that too!
We Linked up at:
All Things with Purpose

Watercolor State Paintings

I’ve been wanted to do a project with watercolors for awhile, and I’ve been seeing these really cute watercolor state paintings all over the internet and I figured it was a great starter project into watercolors. 
I took a watercolor class in college and even though I’m not an expert at it, watercolors are fun to play with and easy to use when you have figured a few things out. (I plan on doing another post about all things watercolor, but that’ll come later.) Today I’ll teach you what you probably already know from elementary school.
Washington Watercolor Painting DIY

Or if you want an instant download,  check out our Etsy site. I’ve been working on a bunch of the other states so let me know if you want a particular state that I don’t have up yet and I’ll get it up and posted within a day or so!
OR make your own!!
You’ll need:
Watercolors (the cheap crayola kinda would even work for this, but if you want deeper more vibrant colors I would recommend going to a craft store and getting a few of the tubes of watercolors, the smallest one would work, with watercolors a little goes A LONG way)
an exacto knife (or if you have a die-cut machine, like a Silhouette or Cricut, you can just cut out your shape)
cutting board, if you are using an exacto knife
watercolor paper (watercolor paper works WAY better than just regular copy paper)
a printout of the state you want
contact paper
paint brush
First cut the contact paper to be larger than the shape. I made it the same size as my paper.
Next put your shape on top of the contact paper, and then on top of the cutting board. With an exacto knife cut out the shape. Take your time, the more detailed you are the better the end result will be.
Next once you have your shape cut out you can pick between the actual shape, or the outline of the shape.
I decided to use the outline of the shape so that the watercolor would create the shape itself. 
I didn’t want the outline of the state.

Next just because I needed to represent the 509 (hahaha sometimes I pretend I’m cool like that) I cut out a heart and placed it on my paper where I’m from, SPOKANE!
After you pressed your contact paper down all the way making sure all the edges are clean and no gaps, I then took a brush and went over my paper with JUST water.
(This method is called wet on wet, and it lets the colors bleed into each other and kinda do their own thing.)

Then I added some color and watch it seep into the water already on the paper. I love me some blue…

Then I had to add some green for the Evergreen State, and mix the colors. Even tip your paper to let the colors run from side to side.

Next I would let it dry. But since I am a little impatient, I took off my contact paper, including the little heart.

See how I wasn’t very careful on the left? Oops!

Next if you want to, I’ve seen some with some specks all over. This is SO simple and fun. First wet your brush, and then add some color to it is nice and wet. Then take your brush and lift it a few inches from your paper. Without touching the brush to the paper, tap or flick the brush so some of the color and water gets on the paper. Do it as much or as little as you want. Its kinda fun, but a little messy.
Then let that dry and you can frame it and hang it up!!
ENJOY!
If you want I scanned in my photo and then added some other elements using my computer. 
But like I said you can always just buy one too!
Idaho Watercolor Painting DIY
We Linked up at: 
All Things with Purpose

Sketches and Snacks

I’m still attending to my sketchbook…are you?
Sometimes when I’m drawing, my pen goes off on it’s own and surprises me. For example, I was just going to draw a car with a load of luggage on top when these two guys showed up for the ride.
Fun Fact: I don’t like drawing eyes or hands. I can. But they’re the most expressive parts of the body and if I don’t have enough time to devote to getting them right, I just don’t draw them. 
That’s why this guy’s eyes are closed. 
And that’s why the cook from my last post had an egg beater instead of a hand.

Another Fun Fact: I either get the munchies when I draw or I forget that food exists and get sucked in to what I’m doing.
Yesterday I had the munchies.
To help resist the urge to eat any and all things made with sugar, I whipped up a plate of cucumber bites.
My friend told me she uses avocado instead of mayo when she mixes tuna or chicken salad. So I tried that.
Um…this is the most delicious snack I’ve ever had.
Okay, maybe that’s a false statement, but they were dang good.

There’s two weeks left in this drawing challenge.
I’m excited to see what I come up with in the weeks to come. I’m also excited to see what you guys are working on as well!
Make It and Love ItWe Linked up at Home Stories A to Z

Ooey Gooey Cinnamon Rolls

ooey gooey cinnamon roll recipe diy

Like I’ve said before and I’ll probably say it again, I have a major sweet tooth! And 9 times out of 10 I will pick something chocolatey and/or peanut buttery over any other sweets. But today I just NEEDED some cinnamon rolls. And I know that my litter helper wouldn’t be upset at all if she got to help, so I got to work making the dough.

AND the best part about the dough is… I’ve already posted the recipe! I used the same recipe I used for my The Best Bread You’ll Ever Make

Don’t worry here is the recipe again…
Ooey Gooey Cinnamon Rolls or (2 loaves of white bread)
     Yields: one dozen cinnamon rolls
1 2/3 cups lukewarm water
2 1/2 tsp yeast
1/4 cup oil
1/4 cup sugar
1/4 cup non-fat dry milk
1 /34 tsp salt
4 cups flour

Filling:
1 stick of butter (1/2 cup), softened
1 cup packed brown sugar
1 Tbls cinnamon

Icing:
2 cups powdered sugar
1 tsp vanilla
3-4 Tbls milk

In a small bowl, combine yeast and water. Leave for about 5 minutes to soften. In another bowl combine oil, sugar, dry milk, and salt. Mix well. Add yeast mixture once it has softened. Add flour, mix and knead. Dough should be slightly sticky to the touch.
Cover dough and let rise until it has doubled in size. Knead.

Roll out dough until it is in a large rectangle about 1/4 inch thick. Spread softened butter on top of the dough. In a small bowl combine brown sugar and cinnamon, mix well, then spread the cinnamon and sugar on top of the butter covering all the dough. Roll up dough to form a log. Cut into 12 even pieces and place swirl side up in a 9″x13″ lightly greased casserole pan. Let rise until all the rolls have expanded filling the gaps in the pan. Bake at 320 degrees for 30-40 minutes or until golden brown. 
(If you want them a little more moist and doughy cook for 30.)

While they are cooking in a bowl combine all three ingredients for the icing. Once the rolls are done, pull them out and add icing and let it get into all the nooks and crannies
…………
…..


Once you’ve made the dough, let it rise, and kneaded it.Roll out dough until it is in a large rectangle about 1/4 inch thick.
(For a more in depth look at how to make the dough check out the white bread post but stop when it says to split into 2 loaves)


And sometimes you have just a little extra dough you can let someone else play with.


 Spread softened butter on top of the dough. In a small bowl combine brown sugar and cinnamon, mix well, then spread the cinnamon and sugar on top of the butter covering all the dough.
Here is can also sprinkle on raisins, or nuts if you wanted to.


Roll up dough to form a log.


Cut into 12 even pieces and place swirl-side-up in a 9″x13″ lightly greased casserole pan.


Let rise until all the rolls have expanded, filling the gaps in the pan.


Bake add icing and enjoy!!


All Things with Purpose

Make It and Love ItWe Linked up at Home Stories A to Z

Challenge Checkpoint

How have you guys been doing with the Drawing Challenge
What have you guys been making?
I have absolutely loved this challenge. My sketchbook has been receiving some much needed attention. When I’m drawing, sometimes I zone out and my mind totally wanders off and I’ve gotten some really good ideas for new projects and new recipes that I want to try out and share with everyone here. 
I’ve also been thinking about how exploring our creativity and sharing it with other people is scary. It can leave us open and vulnerable. We leave ourselves exposed to attack and criticism. That criticism can be good, constructive, or sometimes unkind and hurtful.
 However, I think that kind of vulnerability and openness is one we should be encouraging. Wonderful things can happen when we share what we have made with other people. We have an opportunity to become stronger. We learn and grow and have the ability to inspire others. 

One thing I hope Alix and I achieve with this challenge, and ultimately this blog, is encouraging others to explore their creative side, to be curious and to become more aware of the beautiful things that surround our lives.

Chocolate Chocolate Chip Peanut Butter Cookie Sandwiches

chocolate chocolate chip peanut butter cookie sandwiches recipe
I think my two favorite goodies to make are brownies and chocolate chip cookies. So I end up playing around with my favorites a lot and I end up with lots of variations.
Just like how I used my favorite brownie recipe to make Marble Cheesecake Brownies that I made about a week ago. So GOOD!
My favorite chocolate chip cookie recipe is from a super old Betty Crocker cookbook my mom has.
Found here but I half the recipe.

Thus I created a Chocolate-Chocolate Chip Cookie. And then just because I’m a little bit obsessed with peanut butter I made some peanut butter filling and created the Chocolate-Chocolate Chip Peanut Butter Cookie Sandwiches.
And let me tell you they do not disappoint!
They are super rich so I could only eat about two. But that doesn’t mean I didn’t saved a couple for the next day.
Now on to the good stuff…
Chocolate Chocolate Chip Cookies
1/3 cup shortening
1/3 cup butter or 1/3 cup margarine, softened
1/2 cup granulated sugar
1/2 cup brown sugar (packed)
1 egg
1 teaspoon vanilla
1 1/2 cups all-purpose flour
1/2 teaspoon baking soda
1/2 teaspoon salt
1/4 cup dark cocoa
1/2 cup chopped nuts (walnuts or pecans recommended)
1/2 (12 ounce) package semi-sweet chocolate chips
Preheat oven to 350 degrees. Cream together shortening, butter, granulated sugar, and brown sugar. Then mix in egg, and vanilla. In another bowl combine flour, salt, baking soda, salt, and cocoa. Combine flour mixture with sugar mixture until all ingredients are wet. Add in nut and chocolate chips. Roll into 1-inch balls and place on an ungreased cookie sheet, about 2 inches apart. Bake for 8-10 minutes. Remove from cookie sheet as soon as they are out of the oven and let cool.
Peanut Butter Filling
1/2 cup butter, melted
1 cup powdered sugar
1/2 cup peanut butter
Once the chocolate cookies are cooled, taken a small ball of peanut butter filling, flatten into a patty and sandwich between two cookies.

So Good!!! Enjoy!!

Drawing Deluge

Every day this week, I’ve come home and doodled in my sketchbook for the drawing challenge
I don’t know if my subconscious is trying to tell me something because all I can seem to draw is grumpy old men in ties. They just kind of poured out of pencil every night!
Whatever it’s trying to tell me, the challenge is working. I don’t know how to explain it, but my mind seems more clear and I can feel my creativity coming back to me and I feel motivated to get things done.
I believe that everyone has the ability to create something. You don’t have to be an artist to make something beautiful. So even if drawing isn’t your thing, do something else- do something that makes you happy, that excites and nourishes your creative side. 
I can definitely promise you will be instantly energized.
I’d love to hear how you guys are doing with this challenge!!
kreativ77@yahoo.com

All Things with Purpose

6 Must-Have Sewing Tools

6 six must have sewing tools
(Other than your sewing machine)
As I write this post I just have to giggle to myself.
I have turned into my mom.
This isn’t a bad thing, not at all, I would love to be just like my mom, but if you would have asked me 15 years ago I would have laughed and said something much different.
My mom taught me everything I know about sewing. I remember her helping me at a very early age to sew a pouch with a zipper, which I’m sure she still has somewhere. I always thought she was kinda crazy when it came to her sewing tools. She was very particular.
But now that I’m older, I’ve realized she had a method to her madness and I know why she was so particular. Usually because when you are particular and don’t let little hands bend and goober things up, things stay nicer, work better, and last longer, especially when it comes to her sewing tools. 
Who’d have thought?
Now I’m giggling inside again. Oh if I would have just known these things when I was younger, if I would have just appreciated how awesome my mom was (and still is) when I lived at home.
Now I think I might be a little crazy, and a little particular when it comes to my sewing tools…
……………
Now to the good stuff.
6 six must have sewing tools
Every seamstress, whether you are a beginning or a novice needs these tools.
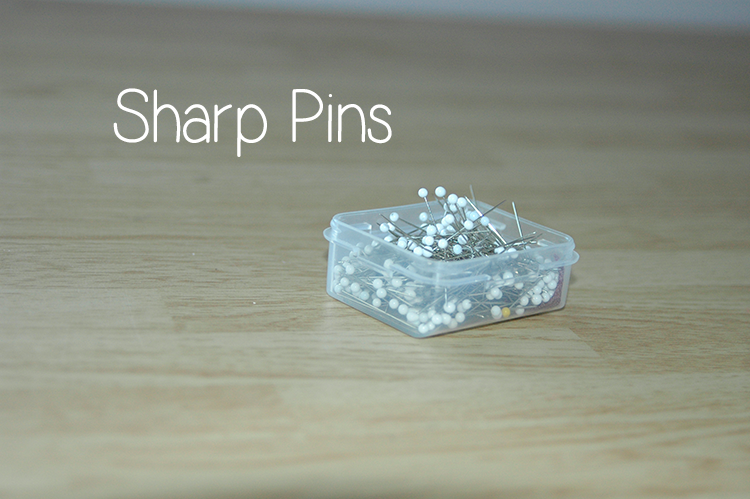
1. Sharp Pins
2. Seam Ripper
3. Seam Gauge
4. Small, Pointed Scissors
5. Fabric Pencil/Marker
6. Measuring Tape
………
These just can’t be any pins, they MUST be sharp (or extra fine). Growing up using my mom’s tools I used her awesome sharp pins. Then when I moved out and started collecting and buying my own sewing tools, I bought the cheapest case of pins the store had. And let me tell you they were awful!! Pinning isn’t my most favorite thing about sewing to begin with so having bad, dull pins made it worst. Lesson learned, spend a couple more bucks and get the nice sharp pins. You’ll be a lot happier.
sharp sewing pins
This is a tool that I have a love/hate relationship with. I HATE it because it seems like I am ALWAYS using it, yes I make mistakes! But I sure LOVE this tool because without it I’m sure I’d just give up on my projects very early on and then never sew again. 
This also comes in handy when you are repurposing items, if you need to take a seam out that is already there so the fabric will work better, lay flatter or whatever, this tool is your friend.
seam ripper
This I use all the time. It usually has a small marker (Mine is blue) that can slide up and down the ruler. It is nice to have the marker to when you are sewing or ironing fabric you can change the gauge to a certain length and it is a easy to keep the seam or the hem the same. 
But in general it is nice to just have a ruler around to measure whatever needs to be measured. I usually measure, and double measure, and triple measure so I have all sorts of rulers, and seams gauges around my sewing room.
Seam gauge
These have become one of my favorite sewing companions, also called embroidery scissors. I use it to usually clip my thread ends, and sometimes it can double as a seam ripper or just a seam snipper. And with the scissors being small they are nice and easy to use, sometimes the larger full size scissors are cumbersome when trying to make small cuts.
 Small pointed scissors
I usually mark my fabric with pins, but sometimes you just need a small mark when a pin wont do. I usually use it when I am sewing from a pattern and the pattern needs a mark for a pleat or a fold. Sometimes a pencil is just way easier. Just make sure that it is a fabric marker or pencil that can be washed out.
fabric marker or pencil
I know I already have a seam gauge which is also a ruler, but usually those are pretty small, usually not over 6 inches or so. But having a longer measuring tape that you can measure fabric or to take measurements on yourself or someone else. You never know when this will come in handy.
measuring tape
All Things with Purpose

Bubbly Nature Creations